Friday, August 31, 2012
DIY Hanging Planter
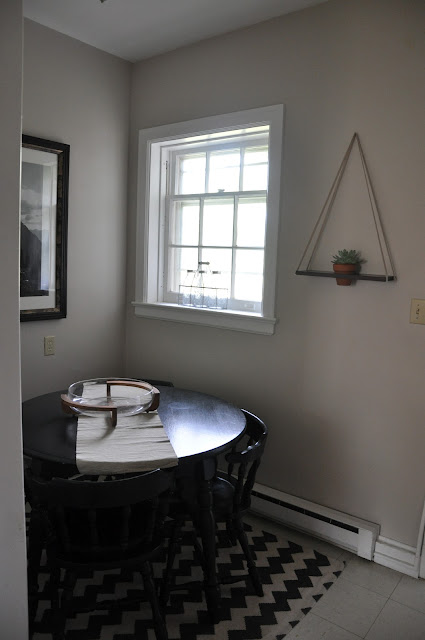
Hey guys! So here is my (& Red's) latest project. I'm a little embarrassed about how long it took me to complete this.....but I guess that's part of this new life as a mom, right? I got the idea from seeing this hanging planter on pinterest (also seen below), but I didn't want to spend the $95 it cost. After all, it is just a piece of wood...
~
So here was my inspiration:
And here's a short tutorial because it was actually a little more complicated than anticipated:
~
1. We went to Lowes and got a large piece of wood (5ft) and had them cut it to the size we wanted. (If you didn't already know, they will cut your wood for free.....I'm sure there's a limit, but if you just want a couple cuts they will do it for no cost.) Then we were driving home with our piece of wood and it suddenly hit us "how are we going to do this?". At that moment we both felt really old......because we couldn't remember the algebra formula to figure out how to create the perfect size circle for our potted plant. I remember doing math homework with my parents and thinking they were so old for not remembering the same thing.
2. So we measured the circumference of the pot we wanted to use and then (after looking up the algebra formula) got the diameter. We then dusted off our old protractor. I'm pretty sure this is the first time our protactor has seen the light of day since high school. Sorry for this sad picture, it's the only one I have of the process.....I'm kind of bad at documenting my projects.
3. I'm sure there is a power tool that would be awesome for this project, but we didn't have one. So- Red drilled into the drawn out circle until it fell out.
4. We sanded....a lot.
5. I chose a walnut stain and gave it two coats on each side (it always ends up darker than I anticipate....I need to get better at picking out stain).
6. Polyurethane.
7. Using this fabric twine that I already had lying around the house (we originally tried balsa wood but that didn't work), Red nailed the fabric twine in with four gold tacs.
9. Project complete! Total cost: roughly $12
Labels:DIY,My Home/Projects
Subscribe to:
Post Comments
(Atom)


Very nice!
ReplyDeleteSo cool & it turned out well. (I wouldn't have been able to think up the algebra on that one either.)
ReplyDeleteThank you Benita & Elisa!
ReplyDelete